Auto Script
Auto Script is the script generation engine within Perf Agent. It takes two browser-recorded HAR files and produces a fully structured JMeter (.jmx) script — complete with correlation, timers, assertions, and parameterization — removing the need to build test scripts manually from scratch.
The generated script is a strong starting point for your performance testing effort. We recommend reviewing the correlation rules and supplementing any additional configuration (such as CSV data files, custom headers, or environment-specific parameters) before executing at scale.

Prerequisites
Before using Auto Script, ensure the following are in place:
| Requirement | Details |
|---|---|
| Perf Agent access | You must be logged in with a valid account |
| Application configured | Your application must be added via Settings → Applications |
| Two HAR files | Both are mandatory — each must be a recording of the same user flow |
Step 1 — Select Your Application
The first field on the Auto Script screen is the Application dropdown. Select the application that your HAR files are associated with.
Applications in this list are managed globally under Settings → Applications. If your application is not listed, contact your Perf Agent administrator to have it added.
Important clarification: The application selection is not limited to just the environment (such as Dev, QA, or Stage). Instead, it represents a logical component or sub-application within a broader project.
Why this matters: The application selection is used for categorisation across Perf Agent. Scripts generated under a specific application are grouped and visible under the same application in Auto Analysis and NFR Strategy Hub, making it easier to manage results and strategies across the platform.
Always match the application to the environment you recorded from. Using the wrong application can result in scripts being grouped incorrectly in Auto Analysis and NFR.
Step 2 — Upload Both HAR Files
Auto Script requires two HAR files — this is not optional.
Click the Upload HAR 1 box and select your first .har file, or drag and drop it into the upload area. Repeat for Upload HAR 2.
Both recordings must be of the same user flow — for example, Login → Search → Add to Cart → Checkout — recorded as two separate sessions on the same application.
Why Two HAR Files Are Required
Dynamic values such as authentication tokens, CSRF tokens, session IDs, and transaction IDs change with every session. By comparing two recordings of the same flow side by side, Auto Script can reliably identify which values are dynamic (because they differ between the two recordings) versus which values are static.
This comparison-based approach is significantly more accurate than single-HAR tools that rely on pattern matching alone. A single recording gives Auto Script no reference point to distinguish truly dynamic values from coincidentally varying ones.
How to Record a HAR File
You can record HAR files using either the Perf Agent Chrome Plugin or Chrome DevTools.
Option 1 — Chrome Plugin (Recommended)
- On the Auto Script screen, click the link at the bottom: "Click here to create a HAR file using the Chrome plugin"
- Install the Chrome extension if prompted
- Navigate to your application and click Start Recording
- Complete the full user flow you want to load test
- Click Stop Recording and save the
.harfile - Log out, open a fresh browser session, and repeat the process to produce your second HAR file
Option 2 — Use of Fiddler or Chrome DevTools
Log out fully between the two recordings and log back in fresh for each session. This ensures the dynamic tokens in both files are genuinely different, which is what the correlation engine relies on.
Tips for Clean HAR Recordings
The quality of your HAR files directly affects the quality of the generated script.
| Do | Avoid |
|---|---|
| Record one complete, focused end-to-end flow | Recording multiple unrelated flows in one session |
| Clear browser cache before each recording | Recording with cached responses — static assets inflate the HAR |
| Use a dedicated test account | Using a production admin account |
| Include login as part of the flow | Starting the recording mid-session after logging in |
| Log out fully between the two recordings | Reusing the same session for both recordings |
Step 3 — Generate the Script
Once both HAR files are uploaded, click the Generate JMX button. Auto Script processes both files and produces a complete JMeter script.
Generation typically completes within a few seconds, depending on the size of your HAR files. The script appears in the Generated JMX Scripts panel once processing is complete.
What the Generated Script Contains
Every script produced by Auto Script includes the following components:
| JMeter Component | Purpose |
|---|---|
| Transaction Controller | Wraps related requests into logical transactions as recorded — grouping steps such as Login, Search, or Checkout for accurate end-to-end response time reporting |
| HTTP Request Samplers | Individual API and page requests reconstructed from your HAR recordings |
| Timers | Think times preserved from your recordings, added as Constant or Gaussian Random Timers to simulate realistic user pacing between requests |
| Assertions | Response code and content validations added automatically to confirm the application is responding correctly, not just responding |
| Correlation (Extractors + Variable References) | Dynamic values — tokens, session IDs, CSRF values — are extracted from responses and referenced in downstream requests using JMeter variables |
| Parameterization (CSV Data Set Config) | User-specific inputs such as login credentials, form values, and search terms are externalised to a CSV Data Set Config element — allowing each virtual user to run with unique data rather than replaying the same recorded inputs |
| Disabled PNG and Static Asset Requests | Non-essential requests such as image, font, and CSS file calls are automatically disabled in the script, keeping the test focused on meaningful application transactions |
| Cookie Manager | Handles session cookies automatically during test execution |
| HTTP Header Manager | Preserves the original request headers from your recordings |
| View Results Tree | Debug listener pre-configured for validating the script before load testing |
| BeanShell Error Logger | Captures and logs sampler-level errors during test execution, making it easier to diagnose failures without manually inspecting every request in the results |
How Correlation Works
For each dynamic value detected through the two-HAR comparison, Auto Script adds two elements to the script:
-
An Extractor — placed on the request where the server first returns the dynamic value. This captures the value from the response and stores it in a JMeter variable. Auto Script uses JSON Path Extractors for JSON responses and Regular Expression Extractors for HTML, XML, or header-based values.
-
A Variable Reference — every downstream request that originally sent the dynamic value has the hardcoded recorded value replaced with the JMeter variable reference (e.g.,
${auth_token},${csrf_token},${order_id}).
These variables are populated at runtime from live server responses, so the script operates correctly regardless of which session it runs in.
Auto Script's correlation covers the vast majority of common patterns. Some edge cases may require manual attention — for example, values embedded inside JavaScript variables within HTML responses, multi-step token refresh flows, or encrypted values. In these cases, JMeter's built-in extractor elements can be added manually after downloading the script.
Step 4 — Download and Validate Your Script
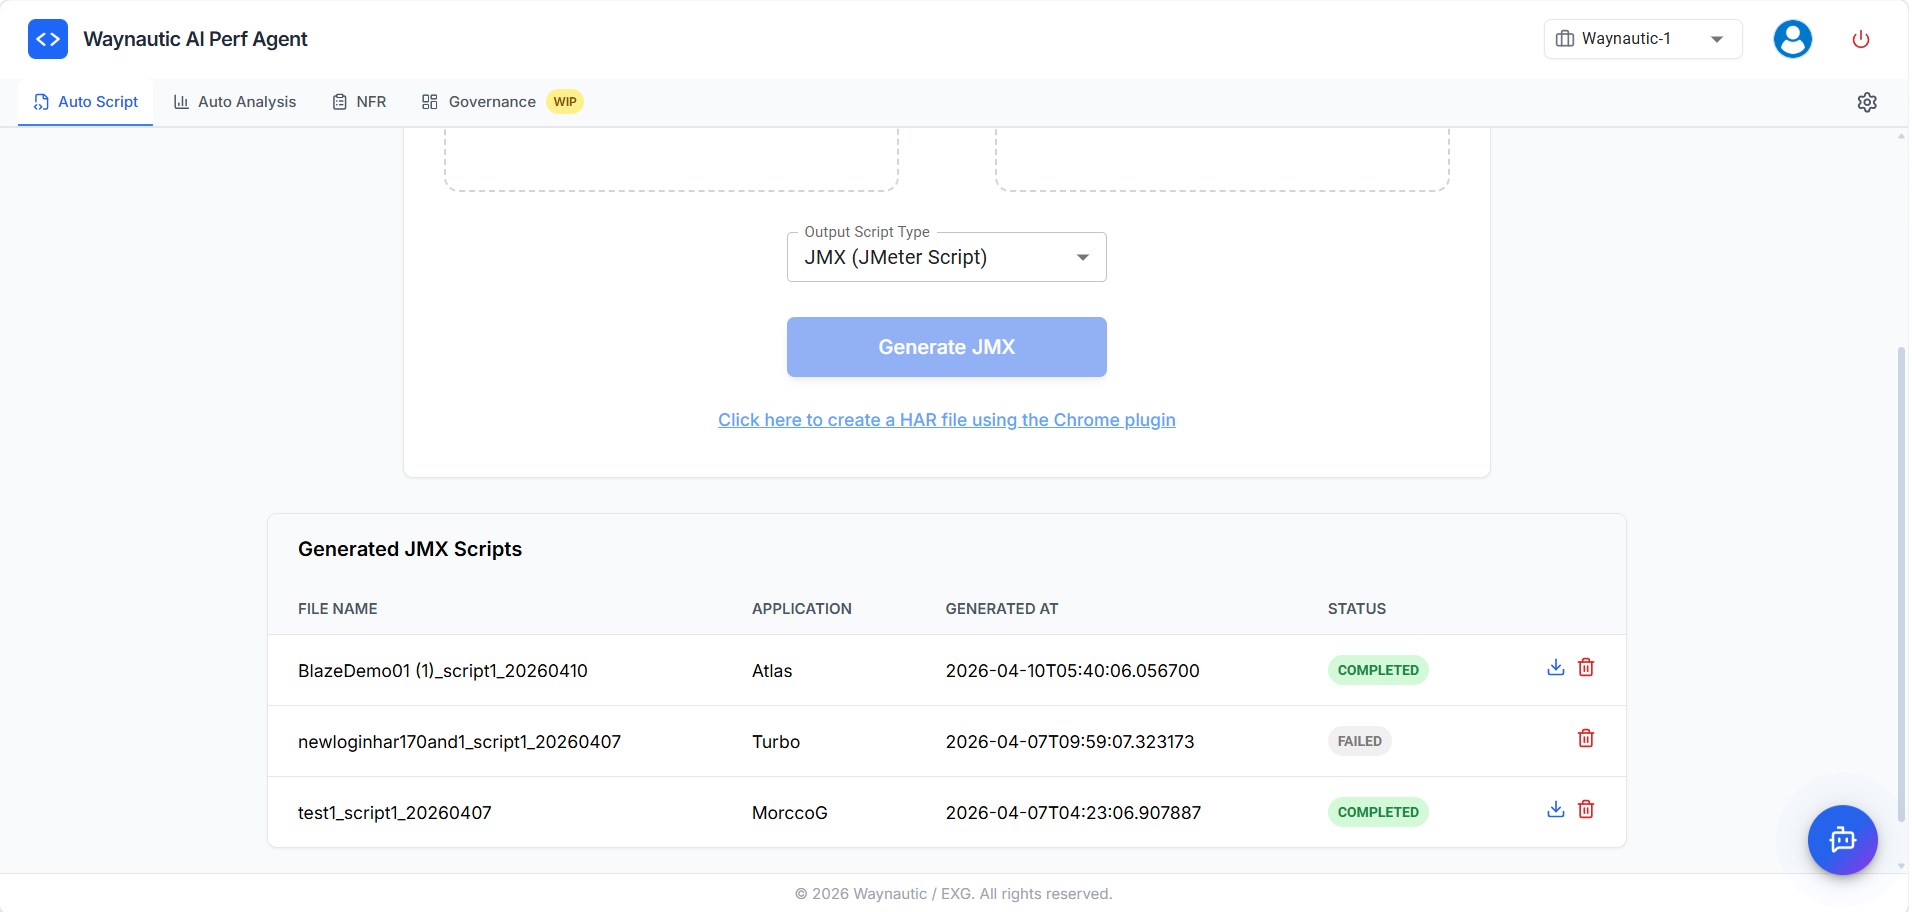
The Generated JMX Scripts Panel
The Generated JMX Scripts panel on the right side of the screen (or below the form in the expanded view) lists all scripts generated under your account.
Condensed view (default): Shows the script file name, a status icon, a download icon (for completed scripts), and a delete icon.
Expanded table view: Click Show More to see the full table with the following columns:
| Column | Description |
|---|---|
| File Name | Name of the generated .jmx file |
| Application | The application selected at the time of generation |
| Generated At | Timestamp of when the script was created |
| Status | COMPLETED (green) or FAILED (grey) |
| Actions | Download and Delete icons |
Click Show Less to collapse back to the condensed view.
Script Statuses
✅ COMPLETED — The script generated successfully. Click the download icon (⬇️) to save the .jmx file to your machine.
❌ FAILED — Script generation encountered an error. No download is available. Common causes:
| Cause | What to do |
|---|---|
| One or both HAR files are empty or corrupt | Re-record and re-upload both HAR files |
| HAR files contain no valid HTTP requests | Ensure you performed actual actions during recording |
| HAR files are too large | Split the recording into shorter, focused sessions |
| Wrong application selected | Delete the entry, select the correct application, and regenerate |
If a script consistently fails with the same HAR files, verify the files contain a log.entries array with multiple entries by opening them in a text editor or JSON viewer.
Deleting a Script
Click the delete icon (🗑️) next to any script to remove it. Deletion is permanent — download the script first if you intend to use it later.
Step 5 — Validate and Prepare the Script
The generated script is ready to open in JMeter, but we recommend running through a validation checklist before executing a full load test.
Verifying Correlation
- Open the
.jmxin Apache JMeter - Enable the View Results Tree listener (it is pre-configured in every generated script)
- Run a single-user test — one thread, one iteration
- In the View Results Tree, inspect each request's headers and body for
${variable_name}references - Confirm the actual sent value matches what the server returned in the previous response
- Check that responses return expected status codes (
200 OK,201 Created) rather than401 Unauthorizedor403 Forbidden
Authentication errors after running the script typically mean a dynamic value was not captured or is being extracted from the wrong location.
Configuring the CSV Data Set
Auto Script externalises parameterised inputs (login credentials, form values, search terms) to a CSV Data Set Config element. After downloading:
- Open the script in JMeter and locate the CSV Data Set Config element
- Update the
Filenamefield to point to your test data file - Ensure the file has one row per virtual user, with column headers matching the variable names used in the script
Disabling the View Results Tree Before Load Testing
The View Results Tree listener writes every request and response to memory. Under high concurrency this consumes significant memory and can skew test results. Once you have validated your script, right-click the View Results Tree element in JMeter and select Disable before running your load test.
What to Do Next
Once your script is validated and the CSV data is in place, you have two paths forward:
- Run locally — Execute directly in Apache JMeter for smaller tests or script debugging.
- Run via BlazeMeter — Head to Auto Analysis to upload the script and trigger a cloud-based load test through your connected GitHub or Azure DevOps pipeline.