Settings
Settings is the global configuration layer for Perf Agent. Everything configured here applies across the entire platform — Auto Script, Auto Analysis, and NFR Strategy Hub all draw from the same settings, so you configure your applications, integrations, and AI models once and they are available everywhere.
Access Settings by clicking the gear icon (⚙️) in the top-right corner of any screen. The left-hand navigation inside Settings is organised into four sections: Applications, Integrations, Profile, and AI Settings.
Applications
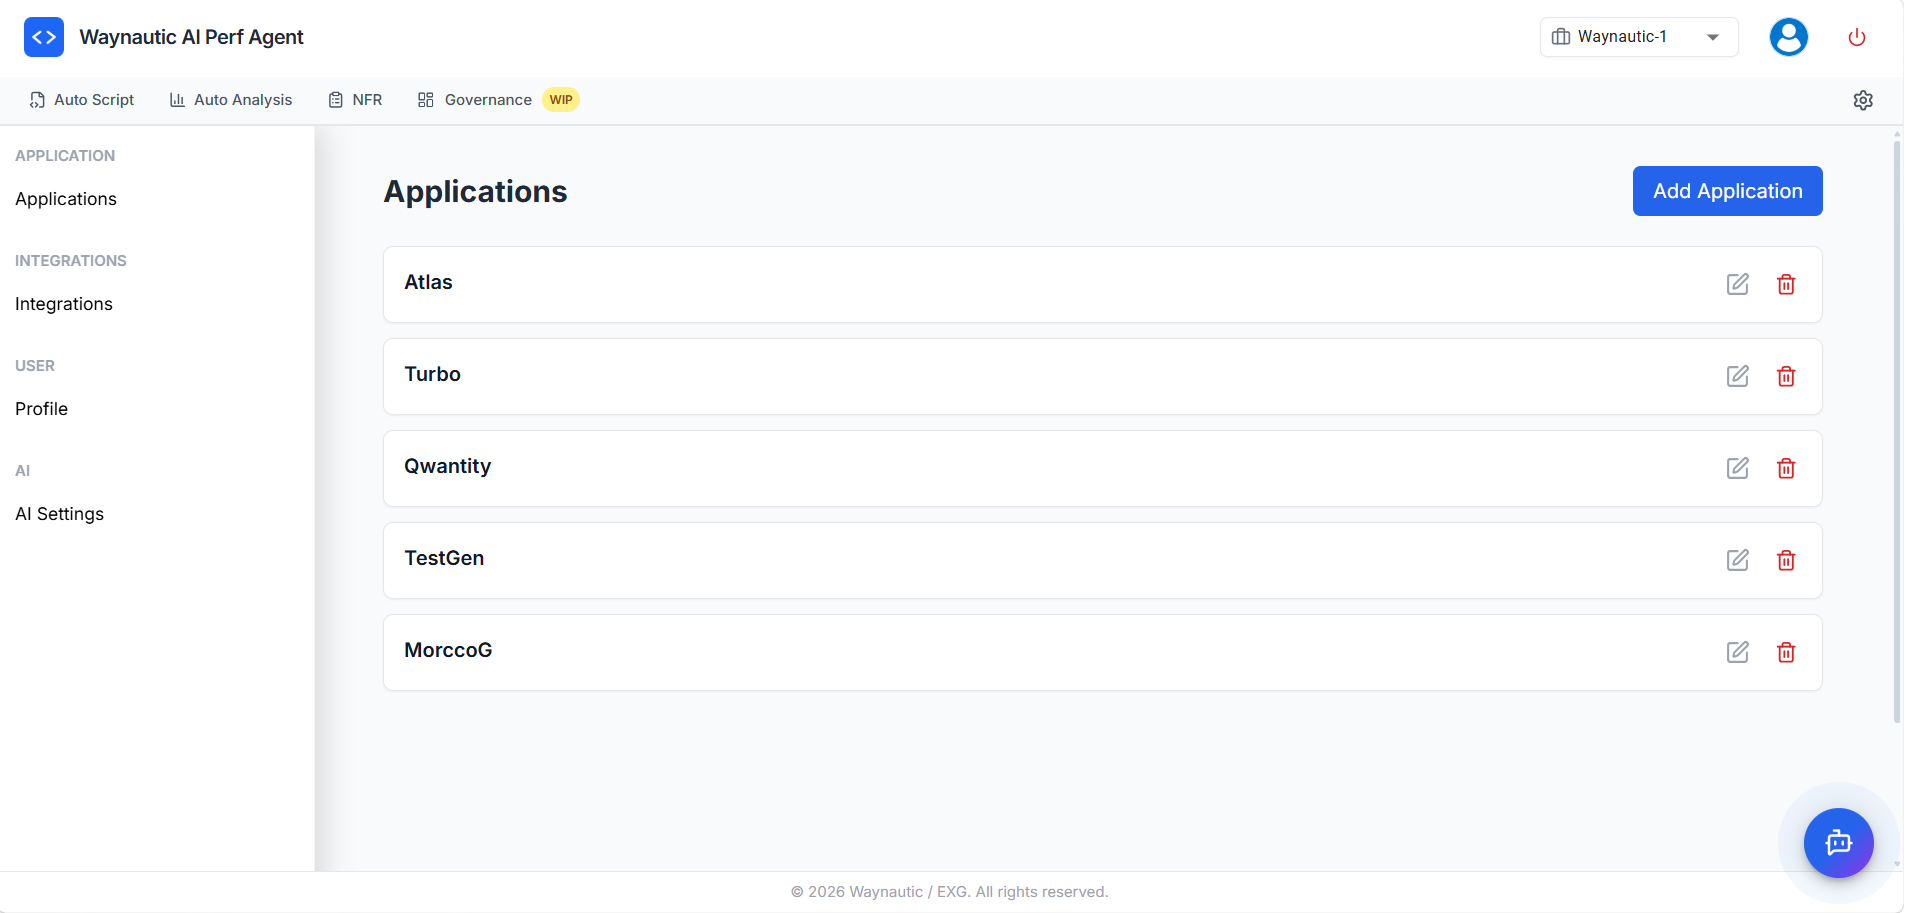
Applications represent the systems or environments your team tests against. Adding an application here makes it available in the Application dropdown across Auto Script, Auto Analysis, and NFR Strategy Hub — enabling consistent grouping of scripts, test runs, and NFR strategies under the same application name.
This section is typically managed by an administrator. Standard users can view and select applications but may not have permission to add or remove them.
Why Applications Matter
Every major action in Perf Agent is tied to an application:
- In Auto Script, the selected application determines how the generated JMX script is categorised and which environment context is applied during script generation.
- In Auto Analysis, test runs are grouped and compared by application, making it straightforward to track performance trends across multiple builds for the same system.
- In NFR Strategy Hub, the NFR strategy — SLAs, workload model, and thresholds — is generated and stored against a specific application, giving your team a clear baseline per system.
Managing Applications
To add a new application:
- Click Add Application in the top-right corner of the Applications page
- Enter the application name
- Save — the application will immediately appear in dropdowns across all three modules
To rename an application: Click the edit icon (✏️) next to the application name, update it, and save.
To delete an application: Click the delete icon (🗑️) next to the application.
Deleting an application removes it from all dropdowns across the platform. Existing scripts, test runs, and NFR strategies associated with that application are not automatically reassigned. Confirm there are no active dependencies before deleting.
Integrations
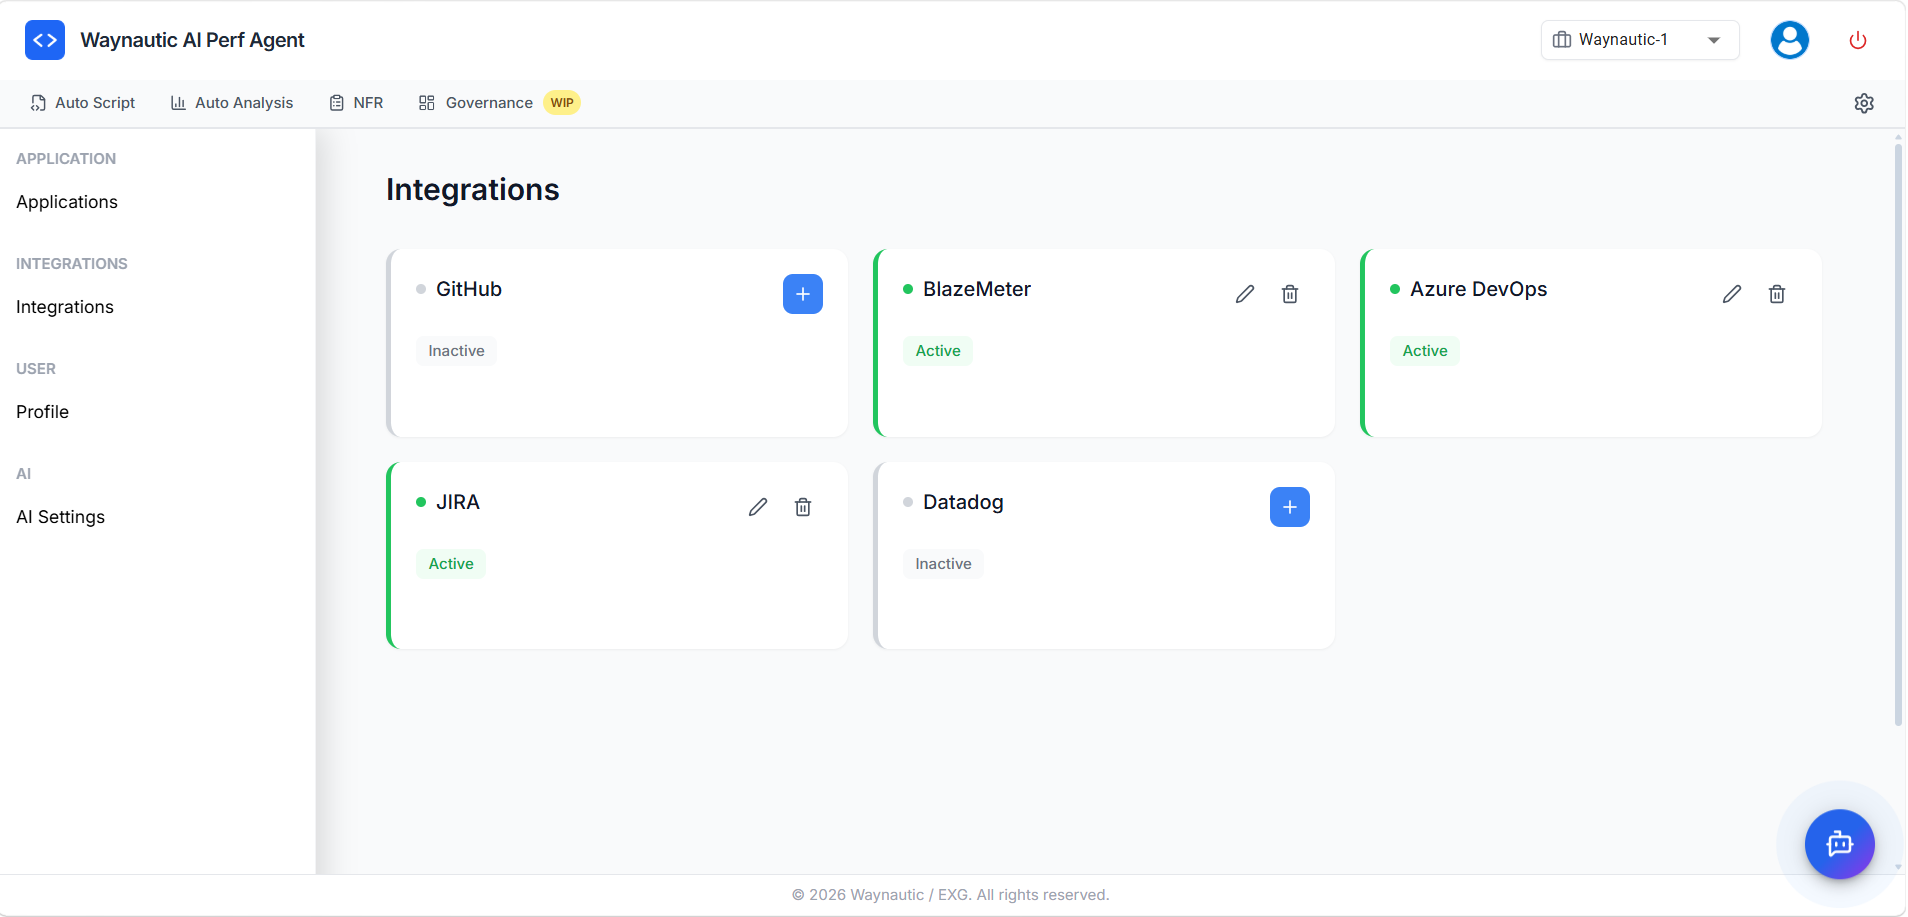
Integrations connect Perf Agent to your external toolchain. Each integration is configured once here and becomes available across the platform. Cards with a green indicator are Active; cards with a grey indicator are Inactive and require credentials to be added before they can be used.
GitHub
Used by: Auto Analysis — pipeline trigger
Connect your GitHub account to allow Auto Analysis to trigger test runs through your GitHub Actions workflows. Once active, a JMeter script can be submitted and a test pipeline initiated directly from Perf Agent without requiring manual intervention in GitHub.
To configure: click the + button on the GitHub card and provide the required personal access token or OAuth credentials.
BlazeMeter
Used by: Auto Analysis — test execution and results retrieval
Connect your BlazeMeter account to upload JMX scripts and trigger cloud-based load tests from within Auto Analysis. BlazeMeter manages the distributed execution infrastructure; Perf Agent handles orchestration, monitors the run, and fetches results once the test completes.
To configure: click the + button and provide your BlazeMeter API key and account details.
Azure DevOps
Used by: Auto Analysis — pipeline trigger; NFR Strategy Hub — work item creation
Azure DevOps serves two purposes in Perf Agent. In Auto Analysis, it can trigger test pipeline runs as an alternative to GitHub. In the NFR Strategy Hub, it is used to push NFR strategy outputs — epics, user stories, and tasks — directly into your Azure DevOps backlog, so performance requirements feed into your delivery planning without manual re-entry.
To configure: click the + button and provide your Azure DevOps organisation URL, project name, and personal access token.
JIRA
Used by: NFR Strategy Hub — issue and epic creation
Connect Jira to allow the NFR Strategy Hub to create issues and epics from your generated NFR strategy. Performance requirements and acceptance criteria are pushed into your Jira project as structured work items linked to the relevant application and test context.
To configure: click the + button and provide your Jira instance URL, project key, and API token.
Datadog
Used by: Auto Analysis — observability and infrastructure metrics
Connect Datadog to bring APM traces, error rates, and infrastructure metrics into your test analysis. During and after a load test run, Perf Agent can correlate JMeter performance data with Datadog observability signals, giving your team a more complete picture of system behaviour under load beyond what JMeter metrics alone can show.
To configure: click the + button and provide your Datadog API key and application key.
Managing Active Integrations
For any integration that is already Active, use the icons on its card to manage the connection:
- Edit (✏️) — update credentials or reconfigure the integration
- Delete (🗑️) — remove the connection entirely
Removing an active integration disables it immediately across all components. Any automated workflows or pipelines that depend on it will stop functioning until the integration is re-added and reconfigured.
Profile
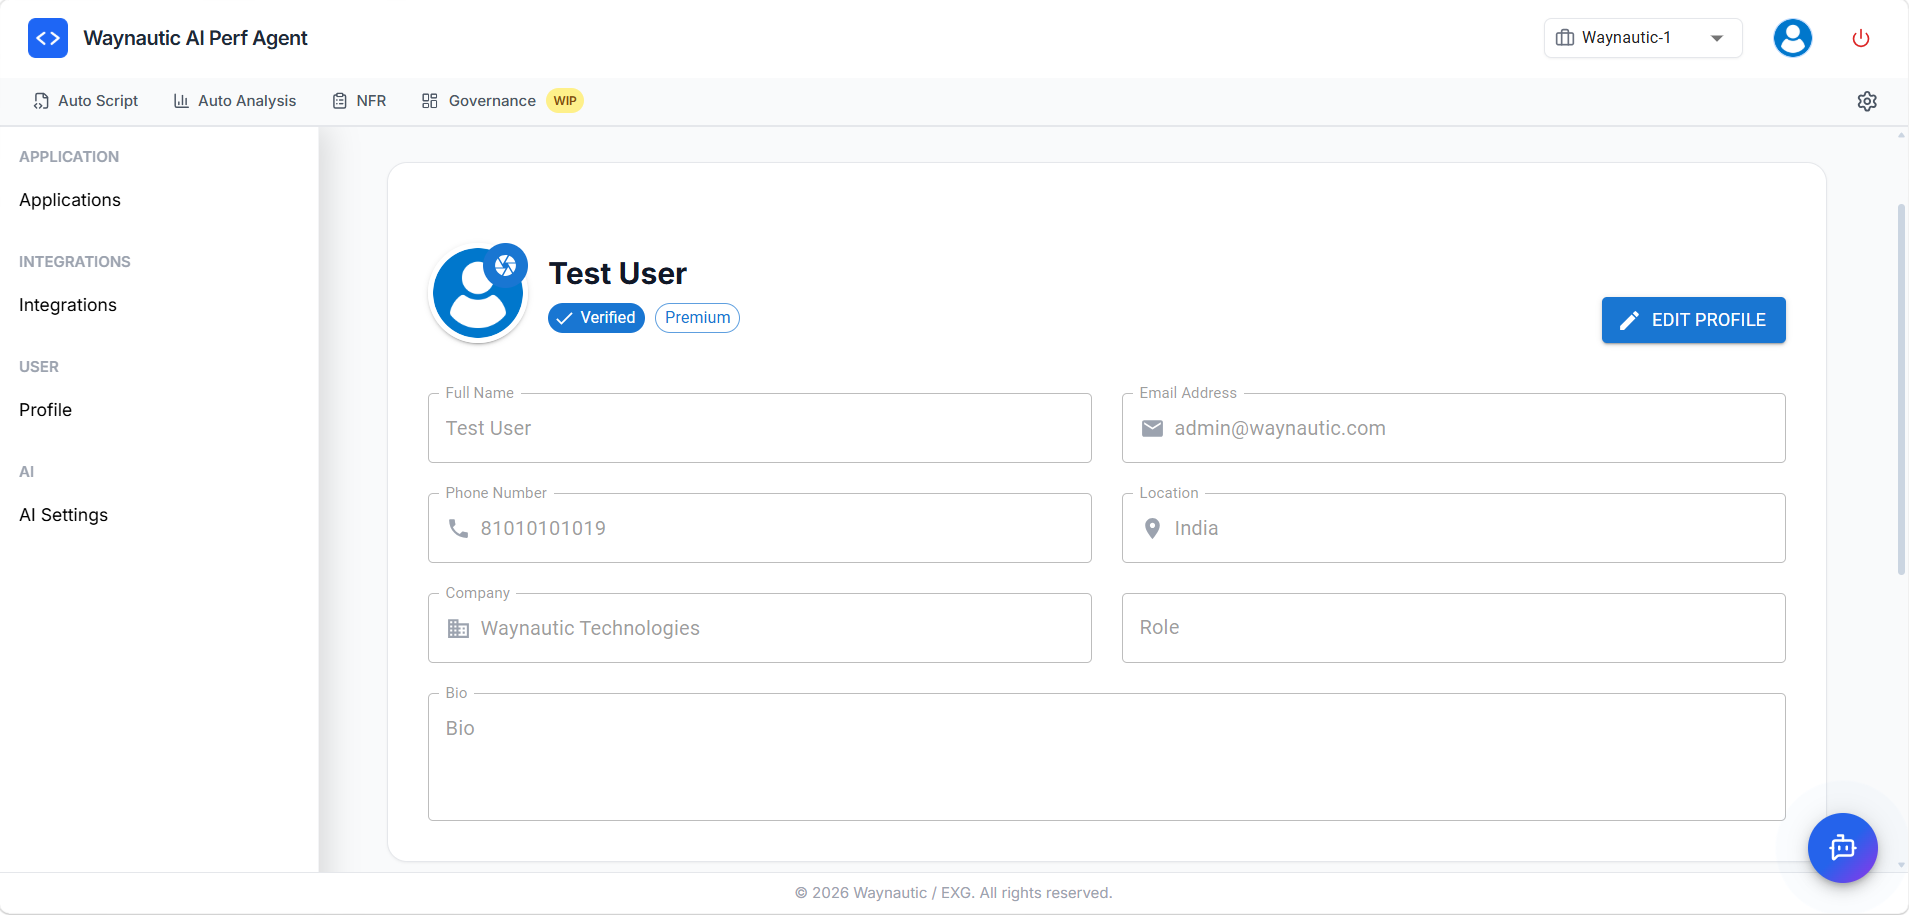
The Profile section displays your personal account details and allows you to update them. This information is associated with your Perf Agent user account and is separate from your organisation's configuration.
Fields Available
| Field | Description |
|---|---|
| Full Name | Your display name within the platform |
| Email Address | Your registered account email — used for login and notifications |
| Phone Number | Optional contact number |
| Location | Your geographic location |
| Company | Your organisation name |
| Role | Your job title or role within your team |
| Bio | A short optional description |
Editing Your Profile
Click the Edit Profile button in the top-right corner of the Account Settings page. Update the relevant fields and save your changes.
Your account badge shows your verification status (Verified) and subscription tier (Premium or otherwise), both of which are managed at the account level and cannot be changed from this screen.
AI Settings
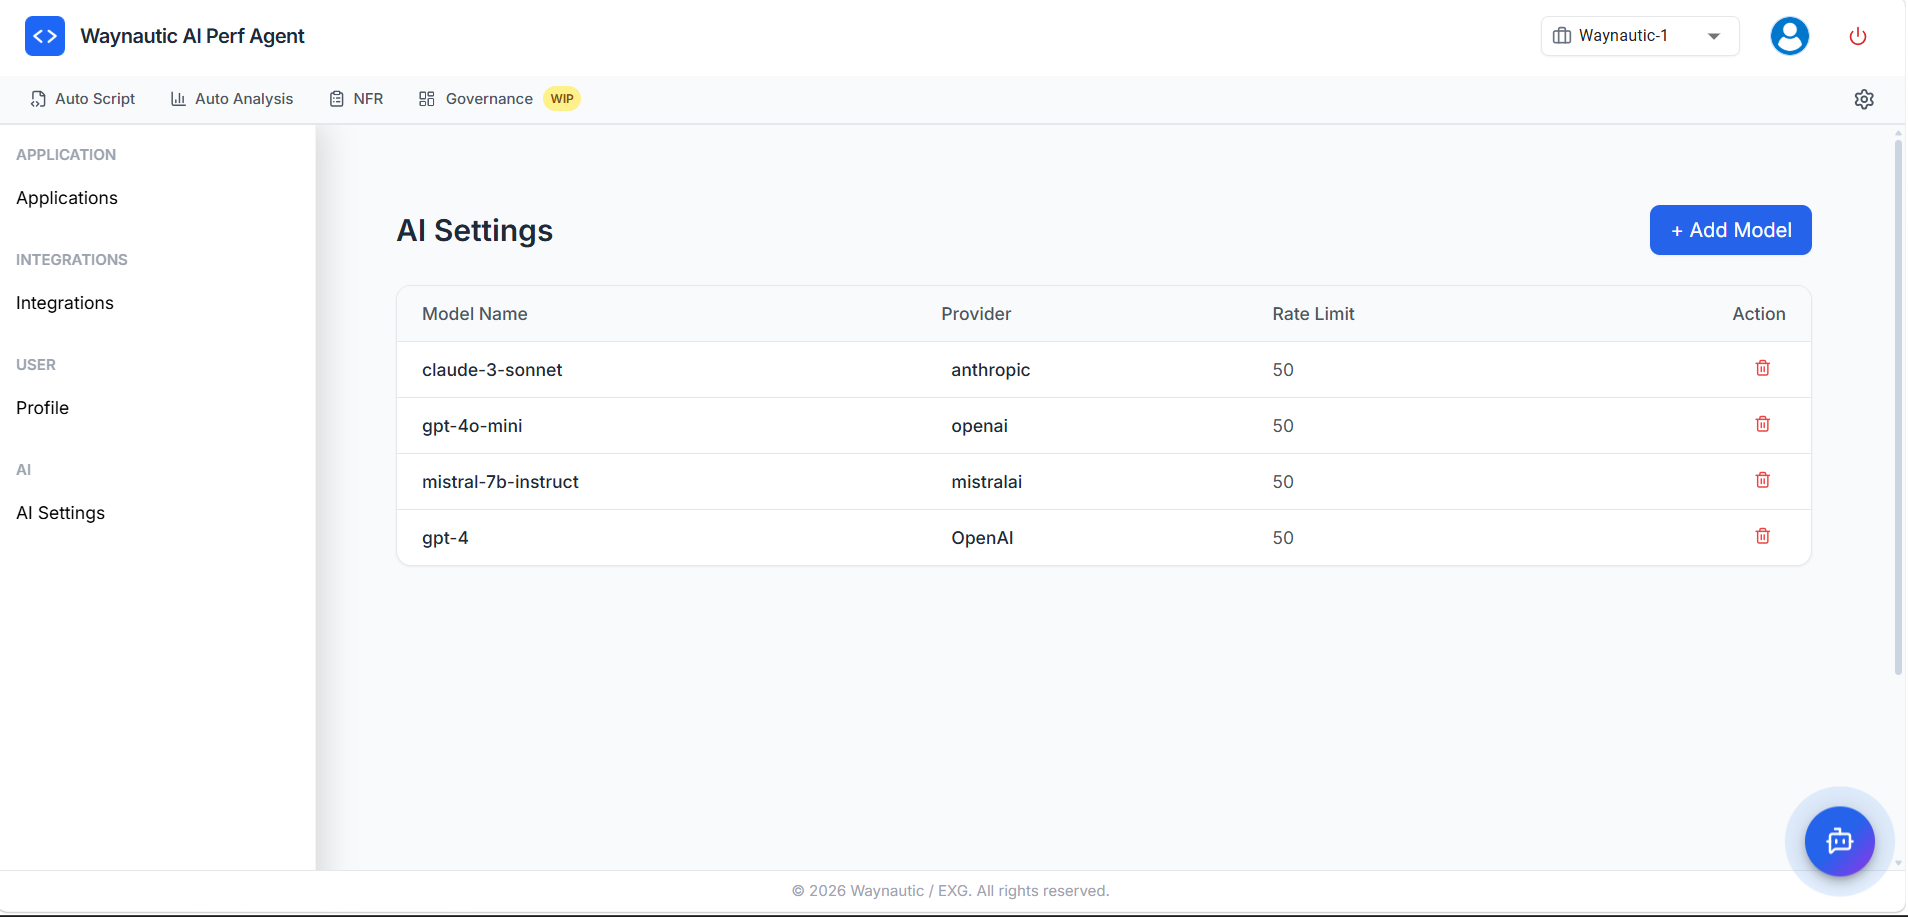
AI Settings is where you configure the AI models available to the Perf Agent Chatbot. The chatbot is present on every screen in the platform and uses the models configured here to answer questions about your test runs, Auto Analysis observations, NFR strategy, and how to use Perf Agent.
Multiple models from different providers can be added and made available simultaneously.
Configured Models
The AI Settings page displays a table of all currently configured models:
| Column | Description |
|---|---|
| Model Name | The identifier of the AI model (e.g., claude-3-sonnet, gpt-4o-mini, mistral-7b-instruct, gpt-4) |
| Provider | The AI provider supplying the model (e.g., anthropic, openai, mistralai) |
| Rate Limit | The maximum number of requests per minute allowed for this model |
| Action | Delete icon to remove the model from the configuration |
Adding a Model
- Click + Add Model in the top-right corner of the AI Settings page
- Enter the model name, select the provider, and set the rate limit
- Provide the API key or credentials required by that provider
- Save — the model will be available to the chatbot immediately
Removing a Model
Click the delete icon (🗑️) next to any model entry to remove it. If only one model is configured and it is deleted, the chatbot will be unavailable until a new model is added.